nilCC Quickstart
Get started with nilCC in under 5 minutes by deploying your first secure workload.
Before you start building, you'll need a nilCC API Key. Request a nilCC API Key by filling out this form
Deploy Your First Workload
Let's deploy a simple "Hello World" API service that runs in a secure Confidential VM.
Step 1: Create Your Docker Compose File
Create a simple API service:
services:
  web:
    image: caddy:2
    command: |
      caddy respond --listen :8080 --body '{"hello":"world"}' --header "Content-Type: application/json"
Step 2: Create Workload
Choose your preferred workload creation method. Both options create the same secure workload but we strongly recommend using the UI to make your developer experience easier.
- Create Workload with UI (Recommended)
- Create Workload with API
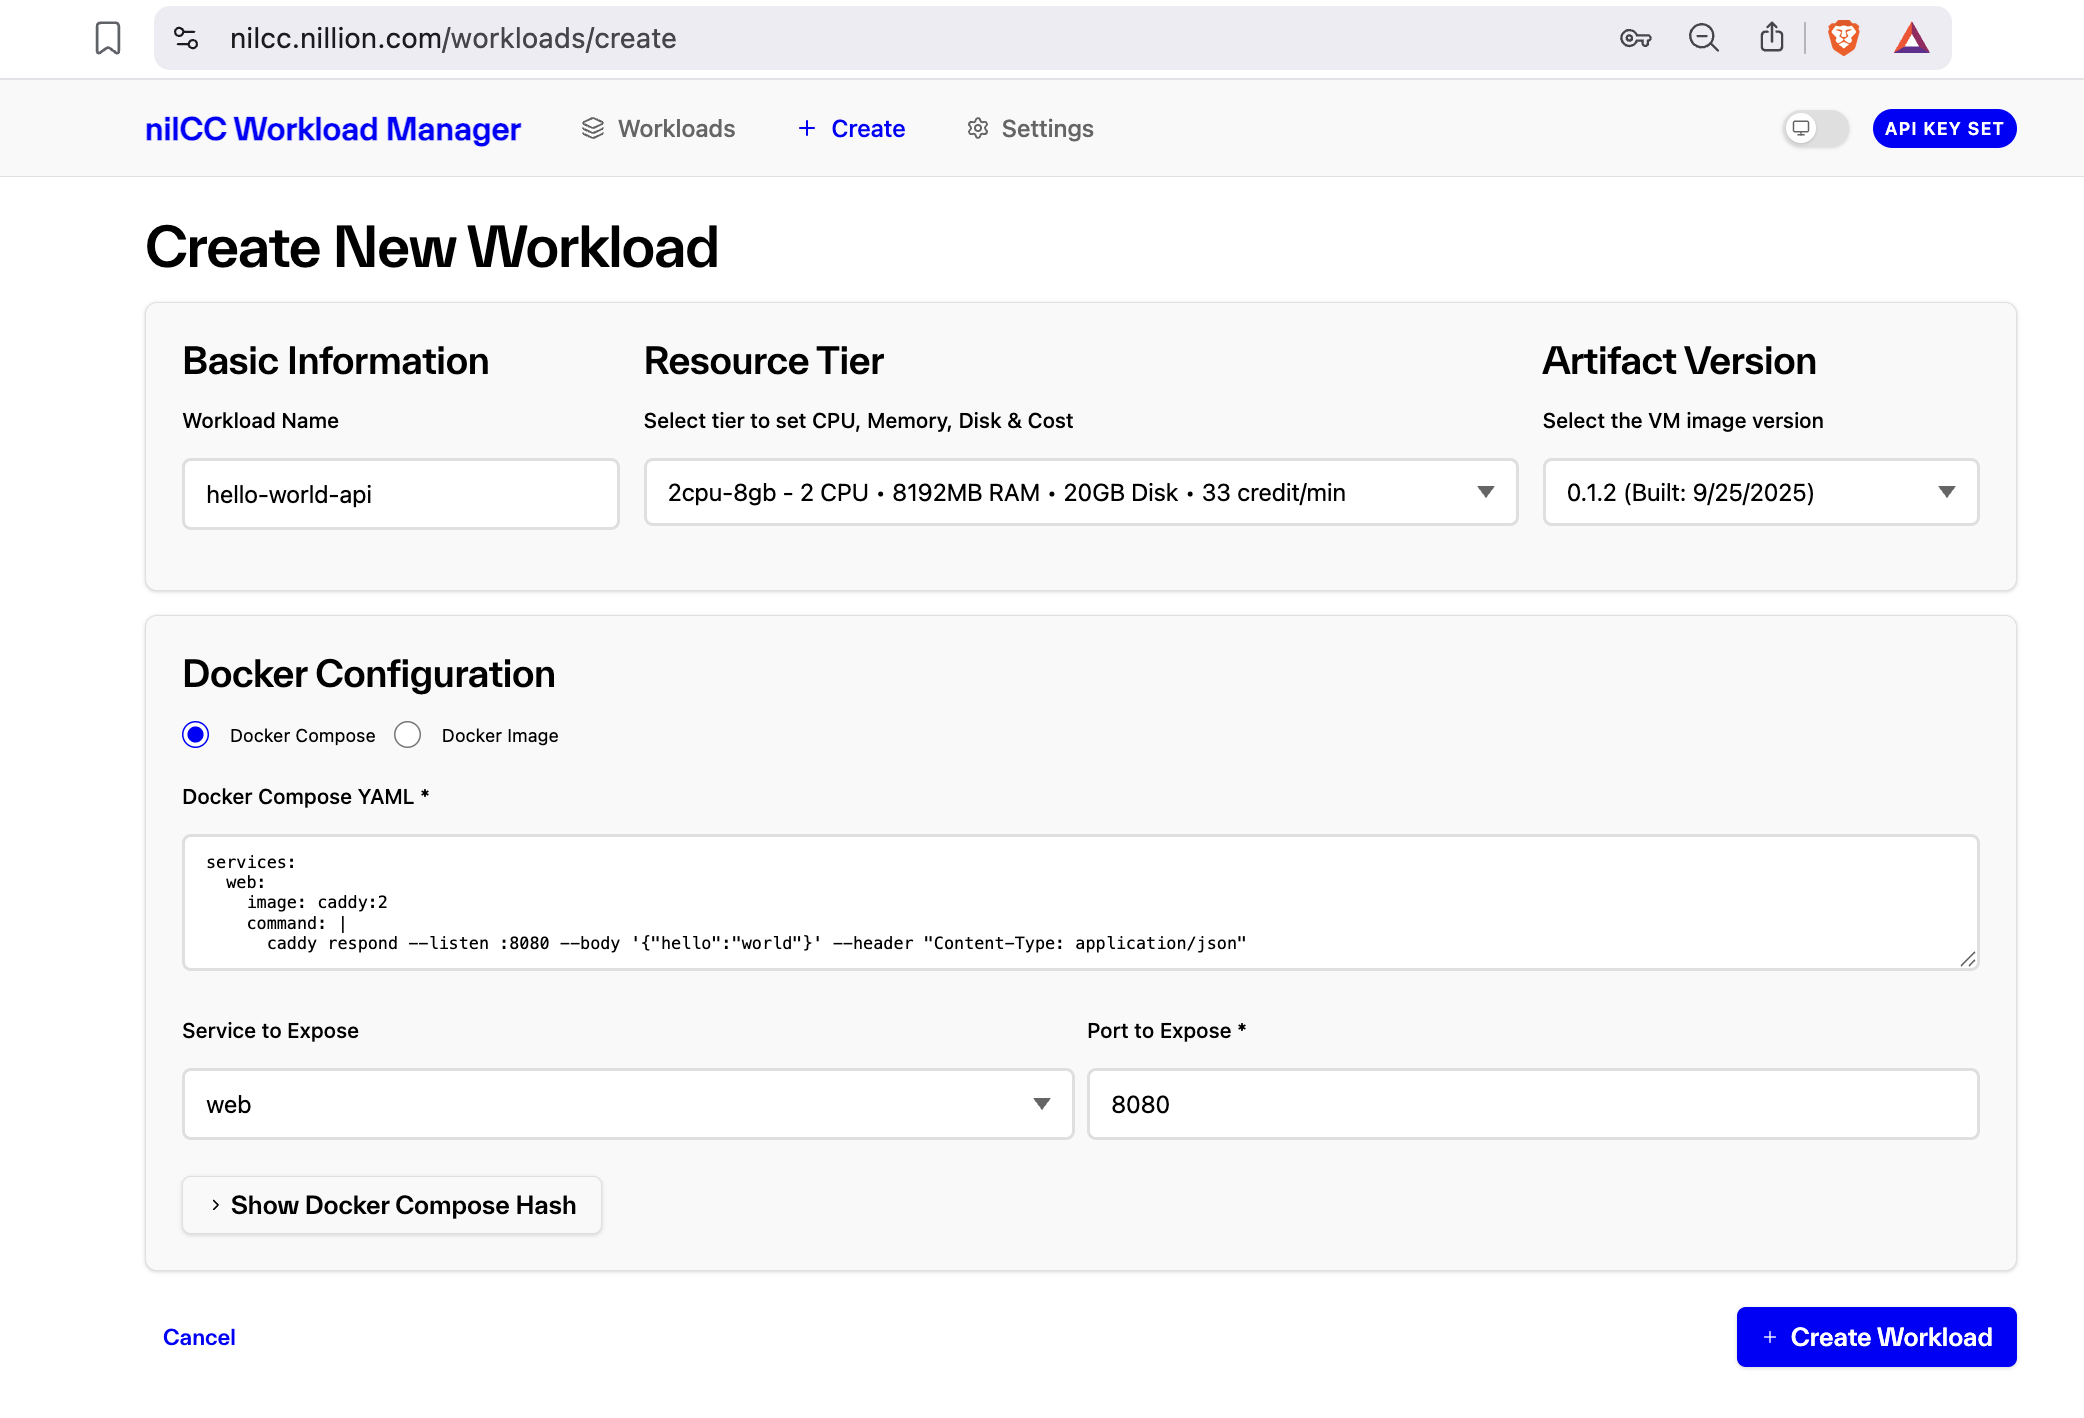
Create a new workload with the nilCC Workload Manager UI.
This workload creation method is recommended for first-time nilCC users, visual workflow management, and ongoing monitoring.
- Visit: nilCC Workload Manager
- Authenticate: Enter your nilCC API Key to log in
- Create New Workload:
- Name:
hello-world-api - Docker Compose: Paste the YAML content from Step 1
- Service to Expose:
web(automatically detected) - Port:
8080(automatically detected) - Resources: Optionally adjust the resource tier as needed
- Name:
- Deploy: Click "Create Workload" and monitor the deployment status in real-time
Create a new workload programatically with the nilCC API. This workload creation method is recommended for automation, CI/CD pipelines, and programmatic deployments.
Update the command below with your nilCC API key, chosen resource tier (cpus, gpus, memory, and disk size), and the latest artifacts version:
curl -X POST https://api.nilcc.nillion.network/api/v1/workloads/create \
  -H "x-api-key: YOUR_API_KEY" \
  -H "Content-Type: application/json" \
  -d '{
    "name": "hello-world-api",
    "dockerCompose": "services:\n  web:\n    image: caddy:2\n    command: |\n      caddy respond --listen :8080 --body '\''{\"hello\":\"world\"}'\'' --header \"Content-Type: application/json\"",
    "serviceToExpose": "web",
    "servicePortToExpose": 8080,
    "cpus": YOUR_CPUS,
    "memory": YOUR_MEMORY,
    "disk": YOUR_DISK,
    "gpus": YOUR_GPUS,
    "artifactsVersion": LATEST_ARTIFACTS_VERSION
  }'
Key API Parameters:
dockerCompose: Your Docker Compose file as an escaped stringserviceToExpose: Which service gets the public domain (must match a service name)servicePortToExpose: Which port on that service to expose publiclyartifactsVersion: nilCC VM image version
Test Your Workload
Access Your Secure API within nilCC
Once deployed, your workload gets a unique domain. Access it at:
# Your workload will be available at a domain like:
curl https://[your-running-workload]
Expected response:
{ "hello": "world" }
Verify Security (Check Attestation)
Prove your workload runs in a secure TEE:
curl https://[your-running-workload]/nilcc/api/v2/report
This returns a cryptographic attestation report proving:
- Your code runs unmodified in a genuine AMD SEV-SNP environment
- No unauthorized access to your workload
- Hardware-guaranteed isolation and encryption
What Happens Behind the Scenes
When you deploy a workload, nilCC:
- Creates a Confidential VM with AMD SEV-SNP hardware security
- Packages your workload as an ISO with docker-compose.yaml, metadata, and environment variables
- Boots securely with dm-verity filesystem verification and LUKS encryption
- Deploys containers with automatic TLS certificates via Caddy
- Generates attestation linking your TLS certificate to hardware measurements
Were you able to complete the quickstart?
Next Steps
🎉 Congratulations! You've deployed your first secure workload on nilCC.
Learn More:
- Understand security constraints - What you can and can't do
- Explore the architecture - How nilCC components work together
- Browse API documentation - Complete endpoint reference
- Check key concepts - Essential nilCC vocabulary
Build Something Real:
- Deploy a secure database with persistent storage
- Run private analytics on sensitive data
- Create confidential microservices
- Build AI/ML workloads with GPU support
